9am-5:30pm
OK, time to start cutting out the mother of pearl! Just to recap....here's the design I'm shooting for:
Using the above design, each piece was cutout of the paper and super glued to the mother of pearl.
Using a tabletop jig saw, each mother of pearl piece was rough cut. I then finished each piece using several small files. Here's the finished products:
Note: I'm still unsure which letters I'll be using, that's why there's 3 different ones shown.
All I have to do now is inlay the mother of pearl pieces into this headstock!!
Next, I spend some more time (actually a lot of time!) getting the final shape of the outside of the top. I used sandpaper to complete this. I have the bridge laying on the top around where it will ultimately be located.
Here's a shot of the neck, top and sides. Nothings glued together, yet!
Now it's time to start shaping the underside of the top. This is gone by drilling guide holes in the underside of the top. These holes will be used to gauge how much wood to carve from the underside. The tool shown below is used to control the drill press depth for the guide holes. It controls the depth down to a tenth of a millimeter.
After setting the gauge to the correct depth, the top is place on the gauge and you start drilling holes.
Here's a shot showing the holes drilled for the 2 most inner rings. Each ring is drilled to a specific depth. Inner most ring is 4.5mm, next ring is 4.1mm, next is 3.6mm and the outer most ring is 3.2mm.
This shows all the depth holes drilled:
Now, using the depth holes as a guide, we start carving the concave of the underside of the top using finger planes.
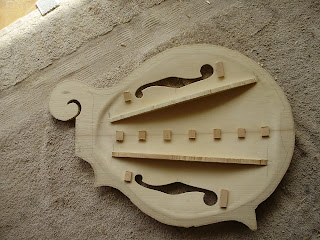
This is the underside of the top after carving to the bottom of each depth hole. Next, I'll clean this up and finish the top to a final depth of:
inner most ring: 4.2mm, next ring 3.8mm, next 3.3mm and outer most ring 2.9mm.


