Thursday, April 26, 2012

April 26, 2012

9:00am - 5:00pm

Before gluing the back on, I first affix the label.


Next, I do a dry run to make sure everything fits tight.


OK, here it is, all glued up.


After letting the glue setup for 3 hours, I remove all claps.
Here's what is looks like.
Front.....


..... Back.


Next up, putting the inlays in the fretboard.
First we lightly glue the inlays to the fretboard. After the glue sets up, I scribed around each inlay.


These are the scribe lines with chalk rubbed in to make them visible.


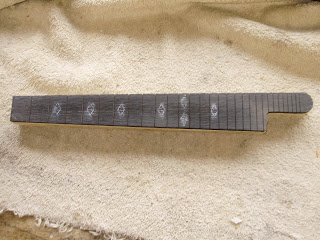
The inlays all installed.


Here's a shot of the fretboard sitting on top on the neck.


Ohhhh..nooooo. I screwed up the fretboard when I was trying to sand the inlays flush!
I rounded the edges of the fingerboard which is a big NO NO!!
Ordered a new fretboard from STEWMAC and will have to start it over.
Oh well, it could have been worse.

Monday, April 23, 2012

April 23, 2012

9:00am - 5:00pm


Finally....finished scraping and sanding the back. 


Added a few cleats to support the book matched back.


Added two dowels for support to the neck to body assembly.


Next, I sanded the back smooth on the table sander.


Here they are, already to be glued together! 


The last thing to build for the mandolin is the finger board. I temporary glued the fingerboard to plywood so I that I can add the binding, frets and inlays.


Here's a shot of the inlays and binding that I'll be using.


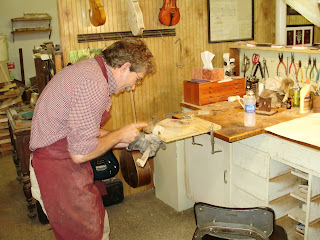
What else is going on in the shop?
How about Ryan hard at work building his bass.


....and Mark building the neck for his next violin. 


Friday, April 20, 2012

April 19, 2012

9:30am - 5:00pm


Still working on the back!
A couple of more hours and it'll be complete.
Scraping...measuring...scraping...measuring....


After I complete the back and before I glue it to the body, I need to afix a 'handmade by' label. Here's the design I came up with using PowerPoint.

Tuesday, April 17, 2012

April 17, 2012

9:00am-4:00pm
After several hours of scraping and sanding, I have the outside of the bottom ready to be glued. Notice the curly maple design in the wood!


But, before we can glue on the bottom, I must first carve and sand the inside. Same drill as the top of the mandolin. I first drill guide holes that will let me gauge the depth to carve. The inner circle guide holes will be 3.6mm deep, next circle out will be 3.1mm and the next 2.9mm.


Here's a shot of the tool used to control the hole depth on the drill press.


Depth holes completed......


 Next, I start carving with the finger plane. Notice the depth guage in the top of the picture.


With most of the carving completed, I'll next redraw the circles and use the scarper to obtain the correct thickness.


Thursday, April 12, 2012

April 11, 2012

09:30am - 4:00pm


Carving  the maple back.


Using the metal scraper......


....and the finger plane. 

Wednesday, April 11, 2012

April 10, 2012

April 5, 2012 9:00am - 4:00pm
April 10, 2012 9:00am - 5:00pm


Dove tail cutout that will hold the neck.


Jig that holds body and neck in place.


Fitting the neck to the body.


Dry run holding everything together.


All glued up....


Neck glued to body.


Started carving the maple back. Routed edge.

Tuesday, April 3, 2012

April 4, 2012

April 3, 2012     09:00am-02:00pm
April 4, 2012     09:00am-05:00pm

OK...now for the hardest and most frustrating part of the build.
Putting the binding on the headstock!

The binding is made flexible by dipping it into hot water. It is then formed to the various sections on the headstock. Also, you must make sure that all joints are mitered to fit. Then you must put glue in the channel and tape the binding into the channel. Easier said then done!

The first 2 pieces were easy....


The next piece was the inside of the small curl. Mark actually formed this piece of the binding. I think he was sensing my frustration!


Halfway there.....


The big curl was a big pain in the ass!! Took several tries to get it right.


Here's all the rest of the pieces tapped up.


All pieces installed.


There were a couple of spots where the binding didn't fit tight. For these, we super glued some ebony powder into the gap.


Final product! Sanded and buffed. Turned out pretty nice in the end.


 A final tweak to make one of the corner joints to match the headstock wood.


Next up, the maple back. Checkout the curly pattern in the curly maple.


I next sanded the maple to a thickness of 15.8mm on the table sander.
I then traced the sided onto the maple and cutout the back on the bandsaw.