Tuesday, May 22, 2012

May 22, 2012

10:00 am - 5:00 pm


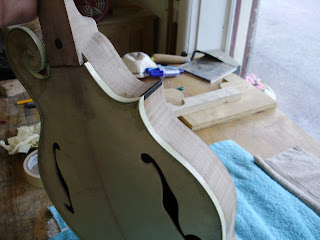
OK...time to put the binding on the top!!

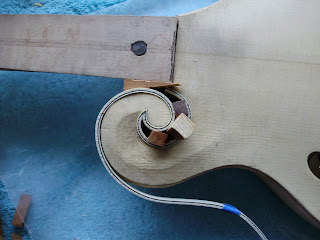
Same routine as when I put binding on the headstock: soak the binding in hot water for several seconds then form it into the channels on the body. Hardest part: the curl of course!!! I spent several hours cutting the bevel and fitting the binding just on this. Used small wedges to hold binding in place while the glue dried.


Here's a shot after all the binding was glued into place on the top. Everything held in place with masking tape until the glue dried.


Here are some shots of the binding after the glued dried.


Next step will be putting the binding on the bottom part of the body. After that I'll need to use a metal scrapper to smooth the binding even with the wood.


As a side note....here are some shots of the F5 Cody is building. He's several steps ahead of me!!

 The color is 'plum' and that's the "Rampant Lion" from the Royal Flag of Scotland on the headstock.


Thursday, May 17, 2012

May 17, 2012

9:30am - 4:30 pm


Well, today I finally finished cutting my channels on the body for the binding. Next step....install the binding. I was actually ready to install the binding today, but since it's a very difficult task, I wanted to wait until next week. By then I should have a fresh set of eyes and a fresh attitude. Until then, here's a shot showing the mandolin with some of its hardware installed (actually just laying on the mandolin).


Wednesday, May 16, 2012

May 14, 2012

9:00am - 4:30pm

Well, not much to report on...just more hand cutting on the body for the channel that the binding goes into.
Here's what it looks like now. Almost looks like a mandolin!!


Thursday, May 10, 2012

May 10, 2012

9:00am - 5:00pm


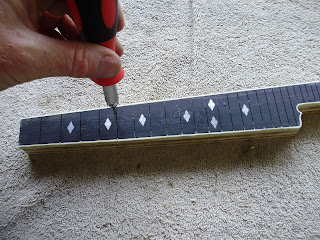
Here's a shot of the finger board showing the frets and binding installed. Notice the little chipouts on the first 9 frets. This was a result of re-fretting. This is a common problem when re-fretting, but is easy to correct. See below.


This is a closeup of the bottom of the fret board. Mark usually does this tapered down design vs putting frets beyond the 21st fret. Beyond 21 is not very functional anyway!


Close up of the finger board inlays.


To fix the chipouts, I first mix up some epoxy with a little ebony dust. Just like I did for the inlays. Using a tooth pick, I dab the epoxy into the chipouts, then let it setup.


After the epoxy has set, I use a razor blade to scrape smooth with the surface. I'll do some final cleanup after the finger board is mounted to the neck.


Also installed the 'dot' markers on the finger board side. The binding will get cleaned up after it's mounted on the neck. For now, the finger board is complete. After it's mounted on the neck, I'll make sure the frets are all flat and then recrown them.


Back to working on the body channel for the binding. The bottom is almost ready, just need to do some final cleanup before going to the front. The scroll was definitely the hardest to cut out.

Tuesday, May 8, 2012

May 8, 2012

9:30am - 5:30 pm


Binding taped and clamped to the finger board.


Binding all installed on the finger board.....


Cleaning out fret slot prior to installing frets.


Each fret is cut 1/16" wider (on each side) then the width of the fret board. Each fret is then put into the wooden holder which is has a corresponding hole for each fret. 


The bottom side of each fret is then trimmed so that the tab fits between the binding on each fret. A special tool (not shown!) is used to accomplish this. Each fret is then tapped into the slot using a plastic ended hammer. Note that after installing 6 frets I realized I forgot to do the finish sanding on the finger board!! I pulled out the installed frets and then sanded the board using the table sander, 150 & 220 sandpaper. I then reinstalled all the frets. The frets will now need to be leveled and recrowned.


Other things I worked on today....
Additional slot cutting on the body which will have the binding installed into. All channel cutting from now on the by hand!

Friday, May 4, 2012

May 3, 2012

9:00am - 5:00 pm


Here's the new fingerboard with the cutouts for the inlays.


....with the inlays in the cutout.


Inlays glued in and sanded off.


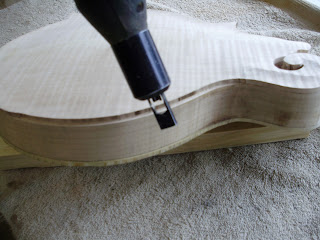
Now, back to routing the channels for the body binding. Here's the front with all the dremel routing completed. The rest of the channels will be cut by hand using gouges.


.....the backside.


April 30, 2012

9:00am - 2:00 pm

Got a new fingerboard and cut/sanded it to shape. Also mounted it on plywood and fitted the plywood for the binding installation. Today, I received my shipment of new MOP diamonds, so I can now redo my inlays.
All in all, this wasn't too much of a setback. And...what the heck...I now have a fancy hot pad to use!!


Next step, route the channels in the body for the binding. This step has me a little nervous since I will be making a lot of cuts in the body I just finished!

Started with the back since it's maple and is a lot harder then the spruce on the front. As it turned out, this wasn't too bad of a task. I just routed out a little at a time until the guide fit flush on the sides. I will need to do  some filing/sanding cleanup on the edges that were routed. I'll also need to do a lot of  hand cutting around the scroll and point areas. 


When routing the front, I did have a little piece of spruce pop off at the point. It split right at the gain. This spruce is really soft!! 
No big deal. Just put on a little wood glue and held it in place with rubber band to dry. From now on, I'll do all points by hand, not with the router.