Tuesday, August 28, 2012

Aug 28, 2012

9:00am - 3:00pm


Today is the day!!
 
 
First up, ream the holes to fit the tuner grommets.


All grommets installed.


Install the tuners.


Front view of tuners.


Next, file slots into the bridge to hold strings.


and finally...file slots in nut to hold strings.


All strung up and ready to play. I actually had to do a few things to set the proper action. First, I had to sand the bridge because it was leaning slightly front too far when strung up. I then had to make addition filings in the nut to lower the action a little.


Mark playing my mandolin.


Cody playing my mandolin.

 
Me proudly holding my mandolin.

 
Well, it took 351 hours to completely build my mandolin. I had several frustrating days, but most days were fun. I really enjoyed building it. Would I build another one? Maybe, but I would need several months off the reflect on this build.
 
Finally, a big thank you to my wonderful wife, Sue. Without her I would never have completed a project as big as this. Sorry I complained so much on my bad days. I really like my new mandolin!
 
What's next....???
Maybe build a bouzouki.......???

Aug 24, 2012

9:00am - 2:00pm

OK, let me start out by saying I didn't get the mandolin done today. I had to order different tuners. Hopefully they'll be here early next week.
 
I did fit the truss cover and tail piece today.


Thursday, August 23, 2012

Aug 23, 2012

9:00am - 4:00pm

Finished the final sanding today.
Looks pretty dull, huh??


Next step is to polish the mandolin. I used 2 different grades of polish.
 
Coarse.... 
 
Fine.... 
 
 
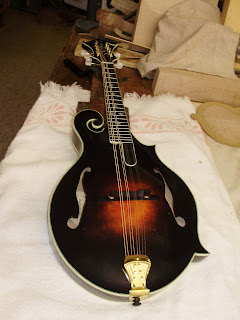
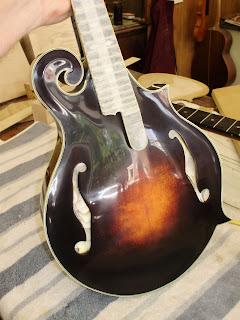
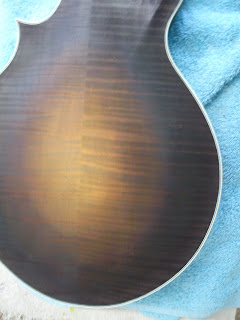
Here are some shots of the polished mandolin.


Tomorrow could be the big day!!

Tuesday, August 21, 2012

Aug 20, 2012

9:00am-4:00pm


Spent most of the day wet sanding the mandolin with 1000 grit sandpaper. Trying to get out all the little imperfections.


Also did a little final polishing. I use 2 grades of polishes on a powers cloth wheel.


Friday, August 17, 2012

Aug 17, 2012

9:00am - 5:30pm
(1 hour of actual work spraying the mandolin)


OK....I'm finished spraying the mandolin!
Total of 16 coats of lacquer.
I'll let it dry for several days before the final sanding and polishing.


Since I really only had about 1 hour of work to do on the new mandolin, I thought I'd have Mark checkout the frets on my Washborn mandolin. Mark confirmed that the frets were worn and needed replaced. We decided to replace the first 13 frets. So here's how it went.....


After taking off the strings, I removed the nut. This was pretty easy since very little glue is used to hold it in place. Simply give it a tap upward toward the top of the headstock and it pops out.


Next I soaked the entire fretboard with lemon oil to make sure it was more flexible. This is, less likely to chip when removing the frets.


After soaking for several minutes, I started removing the old frets. Using a fret puller, I pry each fret out by starting at one side of a fret and slowing working over to the other side. All frets came out very easy. By the way, my fretboard is rosewood not ebony.


This shows all 13 frets removed.


I next cut each new fret to length. About 1/8 wider then the width of the fretboard at the location of that particular fret. After each fret is cut, I place it in a wooden holder that has corresponding numbered holes to store each fret.


Next I trim the lower corner of each side of each fret so that it fits into the fret slot, but inside of the binding.


This is a shot of the trimmed fret before its put into the fret slot.


Each fret is then lightly hammered into its corresponding fret slot. Again I work from on side to the other of the fret. I actually used the plastic side of the hammer, not the side that is pointed at the fretboard in this picture.


Here's all the frets installed on the fretboard.


I then file the sides of the frets even with the fretboard binding.


Next, I make sure that all the frets are flat and even on the fretboard using this diamond file.


After making sure all frets are level using a small metal ruler, I then crown each fret using this tool.


To finished the frets, I sand and polish using 220 sandpaper, 1800 sandpaper, steel wool and wool sock. Sanding is accomplished by putting the paper around a rubber block and running it up and down the fretboard 6 times in each direction.


 Final product!
All stung up and ready to play.


Thursday, August 16, 2012

Aug 16, 2012

9:00am - 5:00pm
(a hour actual work time)


Up to 11 coats of lacquer at the end of today.


(turn your volume down!)


Tuesday, August 14, 2012

Aug 14, 2012

9:00am - 4:00pm
Actual work time today was around 1 hour.
The rest of the time was spend waiting for the lacquer to dry between coats!

I now have 6 coats on the mandolin.  The first couple of coats were put on pretty light. I was a little leery of having drips. I'm now able to spray thicker coats without any problems.
Also picked up some 1000 grit wet/dry sandpaper today to be used after the spraying is completed.


Monday, August 13, 2012

Aug 13, 2012

9:00am - 5:00pm

OK, it's spray time!
After months of building sanding, staining, I'm finally ready to spray the lacquer.


I completed scraping of the binding today. Here are some shots of the mandolin after the scraping.


Before spraying the lacquer, the finger board needs to be taped. It doesn't get sprayed.


After the first coat of lacquer, here's what it looks like.
Amazing how the gain pops out.
I'm using CrystalLac Super Premium Clear Gloss. It's a water based lacquer produces an excellent finish.


14 more coats to go!!!